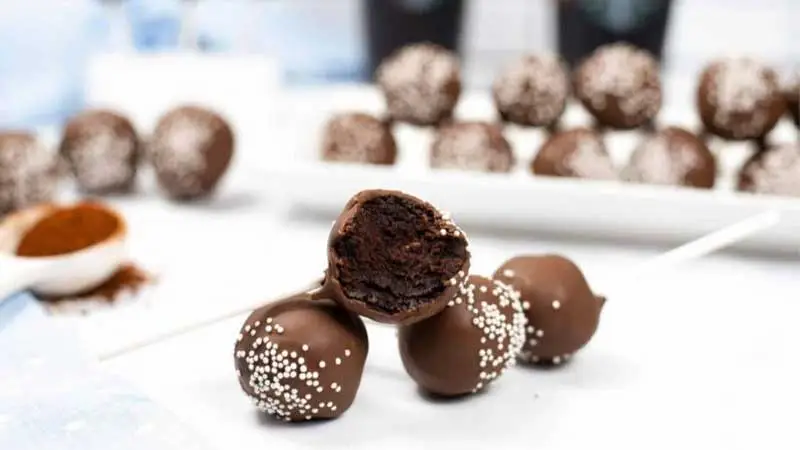
These cake pops are a bite-sized dessert modeled after the ones you can find at Starbucks. They have a moist chocolate cake base coated in chocolate ganache and decorations – perfect for any occasion!

Starbucks Chocolate Cake Pop Recipe
- Prep Time: 30 minutes
- Cook Time: 15 minutes
- Total Time: 1 hour 15 minutes
- Yield: Approx 24 cake pops
Ingredients:
For the cake:
- 1 box chocolate cake mix
- Ingredients called for on cake mix box (oil, eggs, water)
- 1/2 cup chocolate frosting
For coating & decorating:
- 12 oz chocolate chips
- 1/4 cup heavy cream
- Sprinkles or mini chocolate chips (optional)
Equipment:
- Lollipop sticks
Directions:
- Preheat oven to 350°F. Grease a 9×13 inch pan.
- Make cake according to package instructions. Bake for recommended time. Let cool completely.
- Crumble cake into large bowl. Add 1/2 cup frosting and mix thoroughly until a sticky, uniform consistency.
- Roll mixture into 1 inch balls and place on parchment paper-lined baking sheet. Insert lollipop stick halfway into each ball. Freeze for 1 hour.
- In microwave-safe bowl, melt chocolate chips with heavy cream, heating at 30 second intervals until smooth.
- Dip each frozen cake pop into chocolate coating and decorate immediately with sprinkles if desired. Place back onto lined baking sheet to set.
- Let chocolate coating completely harden before serving or packaging cake pops. Enjoy!
Nutrition Fact Of Starbucks Chocolate Cake Pop Recipe:
| Nutrition | Amount |
|---|---|
| Calories | 242.5 |
| Carbohydrates | 30.7g |
| Fat | 10.2g |
| Protein | 3.9g |
| Fiber | 0.1g |
| Cholesterol | 34.8mg |
| Sodium | 65.2mg |
10 Serving Ideas For Starbucks Chocolate Cake Pop Recipe:
1. Bake and freeze cake balls in advance.
2. Put each cake pop in a paper or plastic cup for serving.
3. Add sprinkles or nonpareils to the top of your cake pop using a decorating pen. They come in all colors and designs, so pick out some that look good with your cake pop design! Or you can pipe them on with a piping bag if you have one handy (you can purchase disposable piping bags at the store).
4. Make them in different colors by using multiple cake mixes. I made an orange chocolate cake pop one time and a white chocolate cake pop another.
5. Roll your cake pop in a coating of powdered sugar to give it more of a bakery look.
6. To make a circle shape, roll the Pop in melted white chocolate and then roll it in sprinkles to coat it entirely before freezing it. This gives you a nice candy look when the chocolate hardens.
7. Make a bigger batch of cake pop icing and dip the bottom half of the cake pops in it.
8. Add a few chopped nuts, orange or chocolate chips, or other yummy stuff to the center of your cake ball before adding the filling.
9. You can also make these into cake balls. Just bake the cake layers in a 9×13-inch pan, add the filling and freeze them.
10. You can buy chocolate-dipped strawberries at the store.
Is it Healthy?
This is a question that is asked all the time. You can get the same results from a good, old-fashioned boxed cake mix, but this recipe gives you more control over what goes into your cake pop.
I don’t think it’s healthy because most ingredients are refined sugars and not much else. But you can do a few things to make this a bit healthier.
You can substitute applesauce for some or all of the butter and oil in the cake. You can use egg replacement, flax, or chia seeds as an egg replacer. I also suggest making your sprinkles out of sugar and food coloring. That way, you know exactly what is going into them!
Is it Safe for kits?
Yes. You can use any other mix and replace the cornstarch with almond flour. For the frosting, you can use this recipe or make your own using the same ingredients listed above for the microgreens.
Benefits of Using Keto-Friendly Ingredients in an Easy Recipe:
1. You have complete control of what you’re putting into your body when you make your food from scratch. You know precisely what is going into it, and you can avoid things such as corn syrup, food coloring, and other chemicals.
2. Quick, easy, and delicious! You won’t believe something so simple to whip up can taste so good!
3. A little goes a long way. With ingredients like butter, oil, and condensed milk, a small batch has the same fat as a whole pan of store-bought cake!
4. Save money. When I make my cakes and sweets, I eat as much as I would if I bought them at the store.
5. Experiment! Try new flavors such as peppermint and pumpkin spice, or even throw in some finely chopped nuts or chocolate chips.
6. You can use fresh ingredients instead of processed chemicals. I love using fresh strawberries in my cakes for an excellent taste and appearance, and by using fresh cream cheese instead of powdered, I ensure a smooth consistency when making frosting.
7. Delicious desserts that everyone will love!
8. You can know what’s in your food!
9. The wonderful thing about making your cakes and sweets is that you can customize them! Make a themed cake for a party, give it as a gift, or create one for yourself at every birthday and holiday. My favorite is “Candyland” with peanut butter caramel fondant and raspberry white chocolate ganache!
Conclusion:
This recipe is so delicious you won’t believe how easy it is to make these! You can make them in bunches and give them as gifts, or eat them all yourself because they are so tasty.
They are easy to make and much more fun than store-bought ones. I say give this recipe a shot with your friends and family.
They would love something homemade from the oven instead of store-bought. Try my other recipes, too, like; Devil’s Food Cupcakes, Easy Chocolate Cake, and Triple Chocolate Brownies!
